

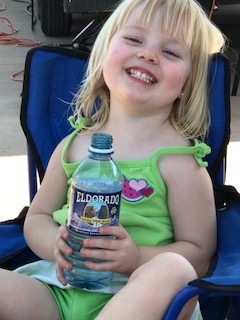
Cleaning Your Bottled Water Cooler is Key to Consistently Superb Tasting Water
We recommend you clean your water dispenser every four to six months. This will ensure you continue to enjoy the great taste of Eldorado water at its best. To get you started, here are the items you'll need before you start the cleaning process:
- Cleaning gloves
- Drying towels
- Cleaning brush
- 1-Teaspoon measuring spoon
- 2-gallon container
- Unscented liquid bleach
- 1-gallon container filled with bottled water
Cleaning Steps:
- Step One: Cut the Power
Where applicable, unplug the power cord. - Step Two: Lift the Bottle from the Dispenser
Remember to replace the cap for re-use if water remains in the bottle. - Step Three: Drain the Excess Water
Drain all remaining water from the cold faucet into a container and discard. - Step Four: Remove Cool
If the dispenser includes a no-spill device and/or a removable baffle, these will also need to be taken out. - Step Five: Ensure All Water is Drained
Any remaining water should be drained from the cooler and discarded. Melt any ice ring in the reservoir with hot water and drain it as well. Be careful to not allow water to get into the interior of the cooler. - Step Six: Prepare the Cleaning Solution
Prepare a cleaning solution in the 2-gallon container by adding one teaspoon of unscented liquid bleach for each gallon of water. - Step Seven: Clean the Reservoir Interior
Wearing cleaning gloves, dip the cleaning brush into the cleaning solution. Allow excess solution to drain from the brush and then clean all surfaces of the reservoir interior. Be careful to NOT pour the cleaning solution into the reservoir. - Step Eight: Rinse the Reservoir
Fill to 1/2 inch from the top of the reservoir with bottled water from the 1-gallon container. Then, completely drain this water through the cold faucet. - Step Nine: Clean the Other Components
Clean the cooler top, drip receptor, faucets, removable baffle, and no spill device with the cleaning solution. Be cautious to keep the air filter dry during the cleaning process. Rinse these parts in the container filled with bottled water. - Step Ten: Reinstall the Parts
While still wearing gloves, reinstall removable baffle, cooler top, no-spill device, faucets. - Step Eleven: Replace the Bottle
Replace bottle on the cooler and allow a minimum of two cups of water to flow through each faucet until there is no taste or odor of chlorine. - Step Twelve: Plug the Cooler Back In
Ensuring all spilled water has been dried from the device and floor, you are ready to plug the cooler back into the electrical outlet. It may take forty-five minutes for the water to adjust to desired temperature.


Water Plans Made Just For You
Very simple, lets get started
Find out how much water you will need by using our water calculator.

